
Nexenta Blog
Introducing “The Essential”- A Quick-Start NexentaStor Virtual Storage Appliance
25 Jun 2019 by Nexenta
In any datacenter there is a built-in need for enterprise file and block storage services. However, in smaller branch offices or in cloud deployments, deploying a bare-metal appliance might not be feasible or economical. Never the less, file storage is almost always needed for applications and document storage.
These are the use cases where the NexentaStor Virtual Storage Appliance (VSA) shines. It’s easy to deploy and can leverage existing virtualization solutions to provide enterprise storage capabilities out of your existing infrastructure.
While I will focus this blog on a smaller configuration, keep in mind that the NexentaStor VSA solution can scale as long as you provide additional compute and storage resources. Some of our customers run NexentaStor VSAs with hundreds of terabytes of usable capacity.
Below I will walk you through how you can download and deploy “The Essential”, a NexentaStor VSA that is preconfigured with 8TiB of usable storage for File or Block services. It deploys with ease, directly into your VMware environment.
All you need is a VMware ESX server and storage for the NexentaStor VSA.
It really is this easy – Don’t be afraid to try it out in your lab!
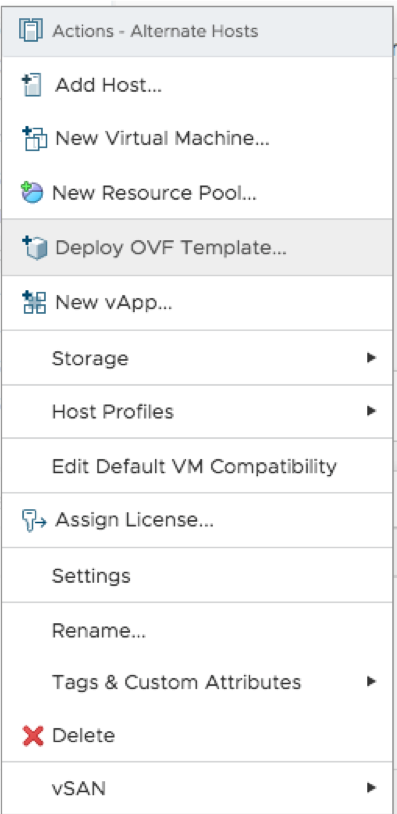
- In VMware vCenter, right click on your ESX server and choose “Deploy an OVF Template”.
vCenter is not required, but if you use the ESX host directly the screenshots may not match.
- When asked to enter the URL of the OVA/OVF enter
https://prodpkg.nexenta.com/nstor/5.2.1.8/addons/NexentaStorVSA-Essential-5.2.1.8.ovf, and if asked, click “Yes” to trust the SSL certificate.
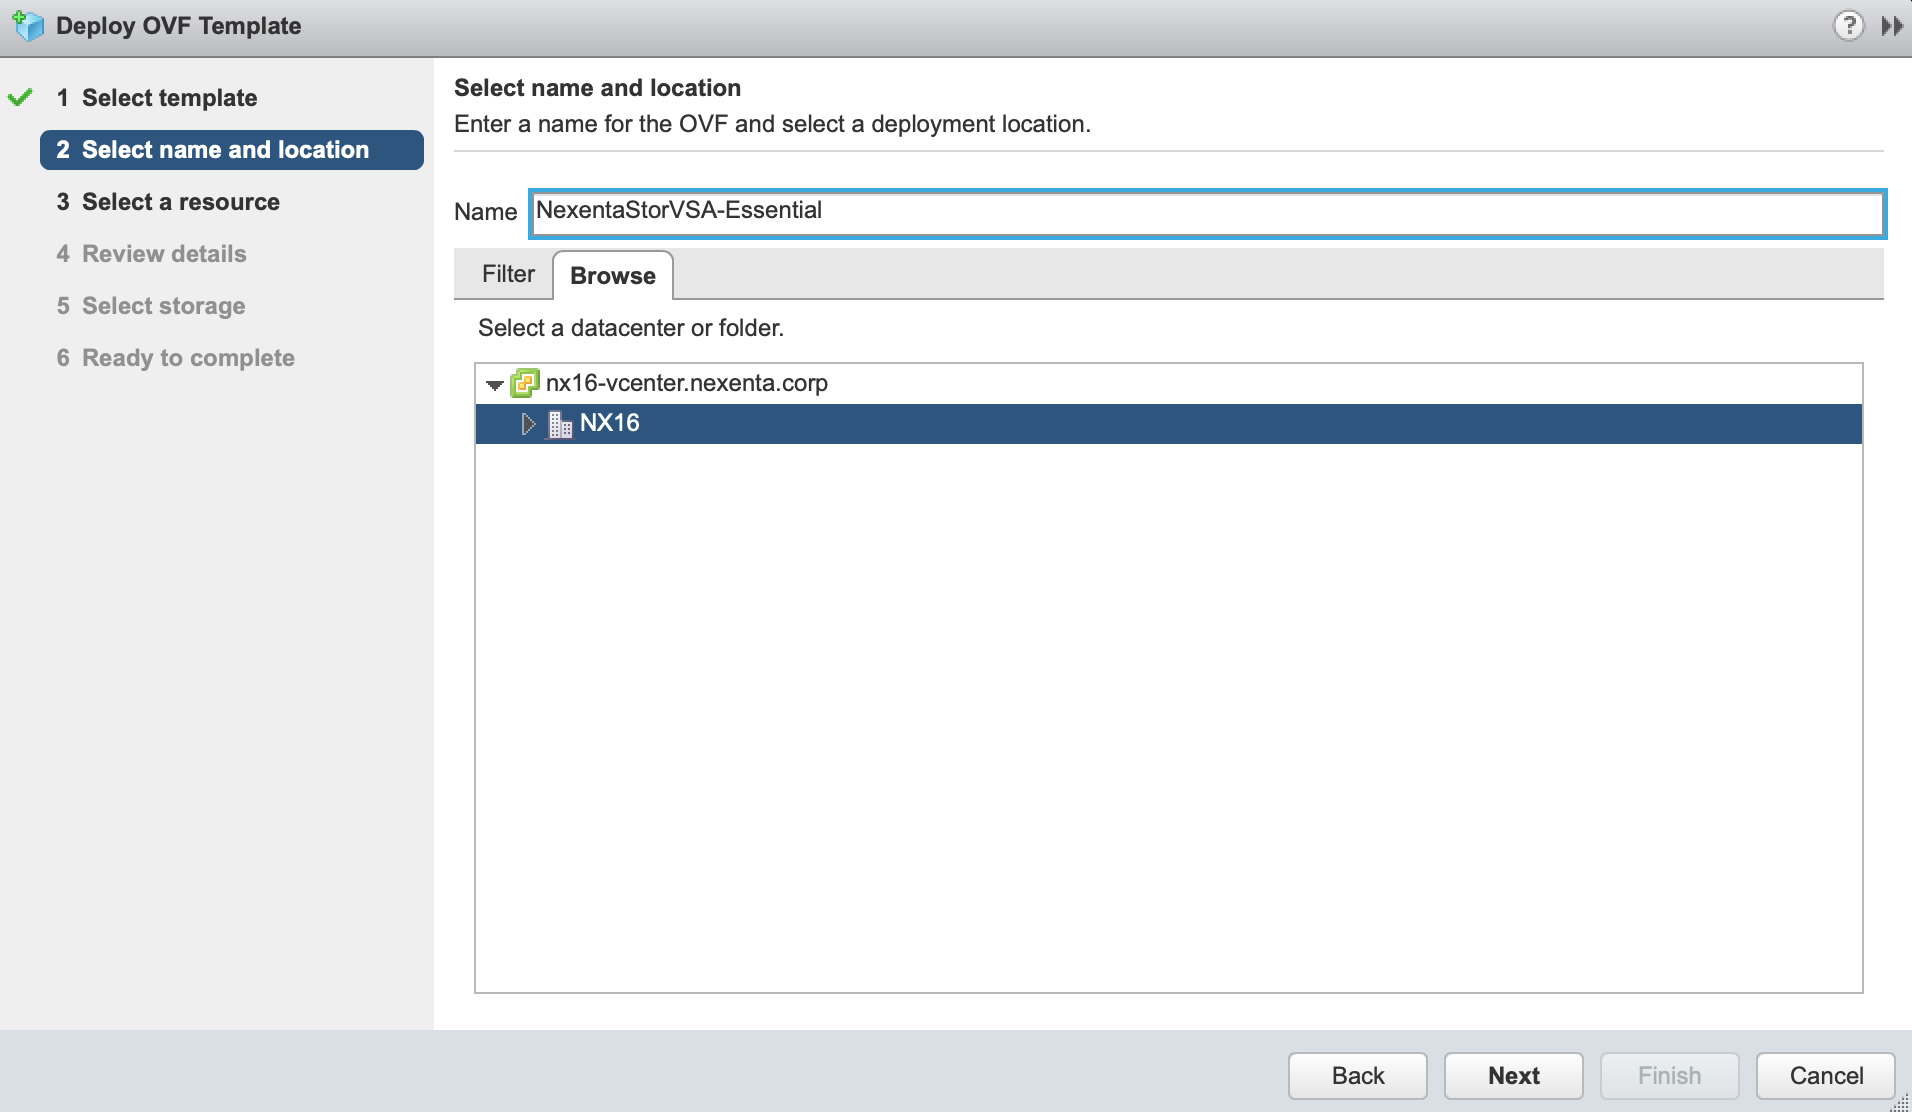
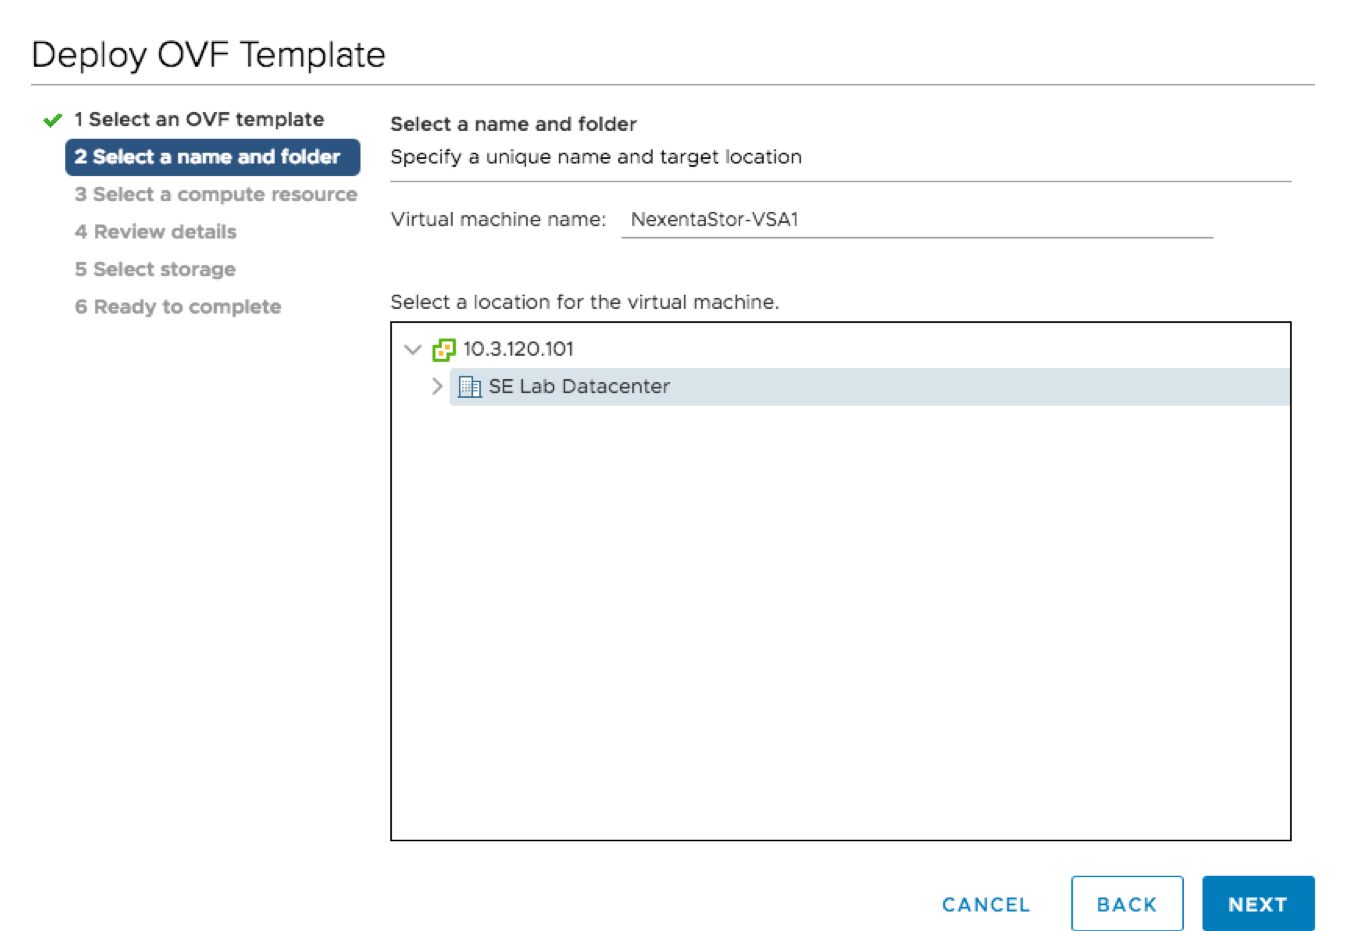
- Pick a name your Virtual Storage Appliance and then choose a folder.
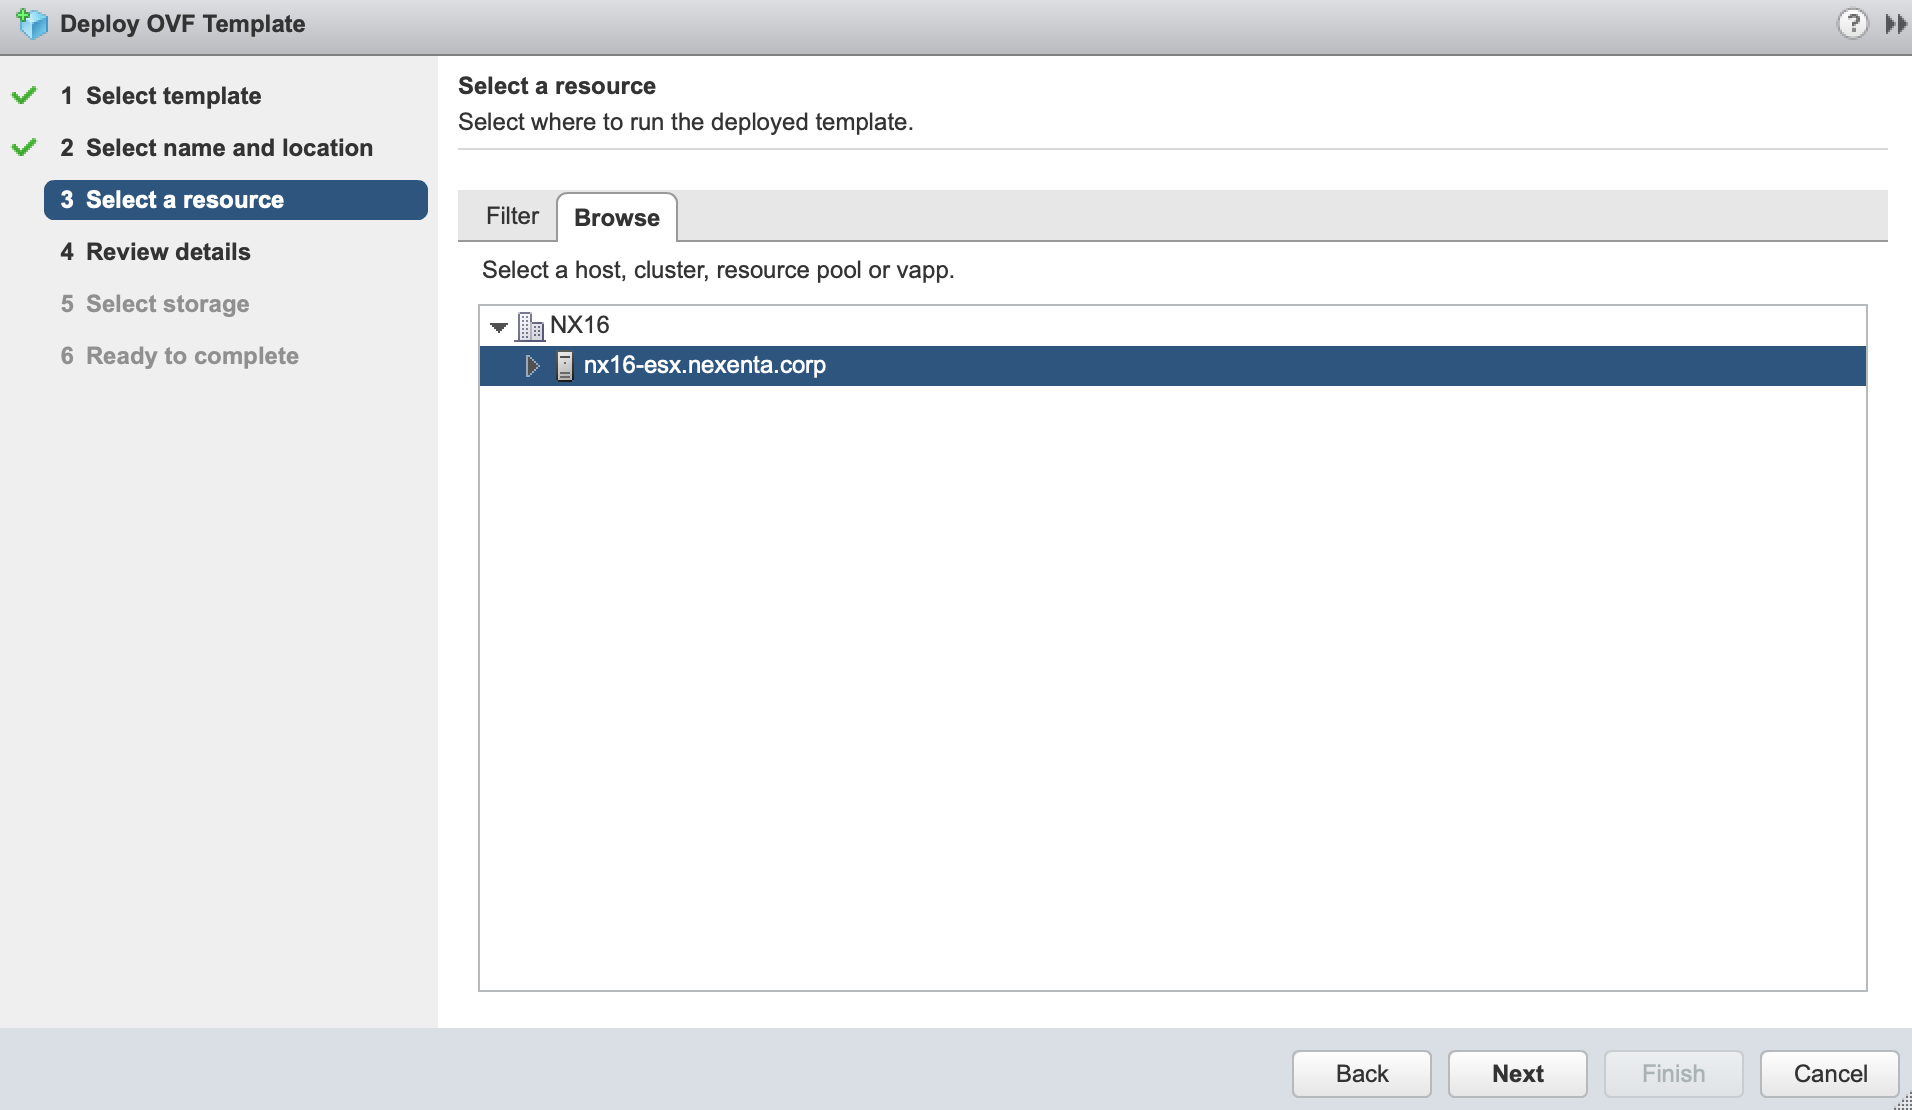
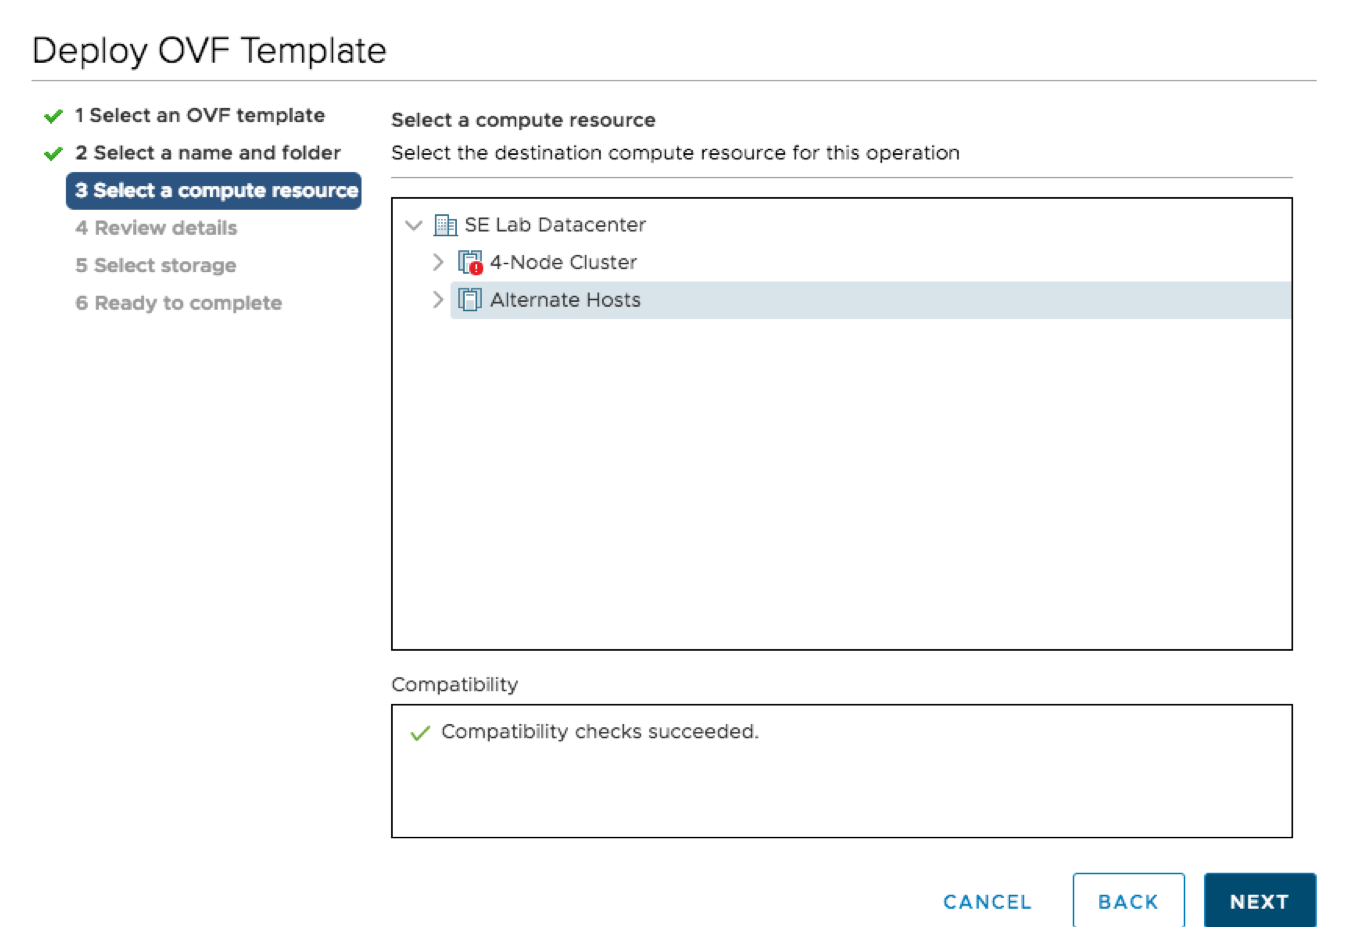
- Select where you want to run your VSA.
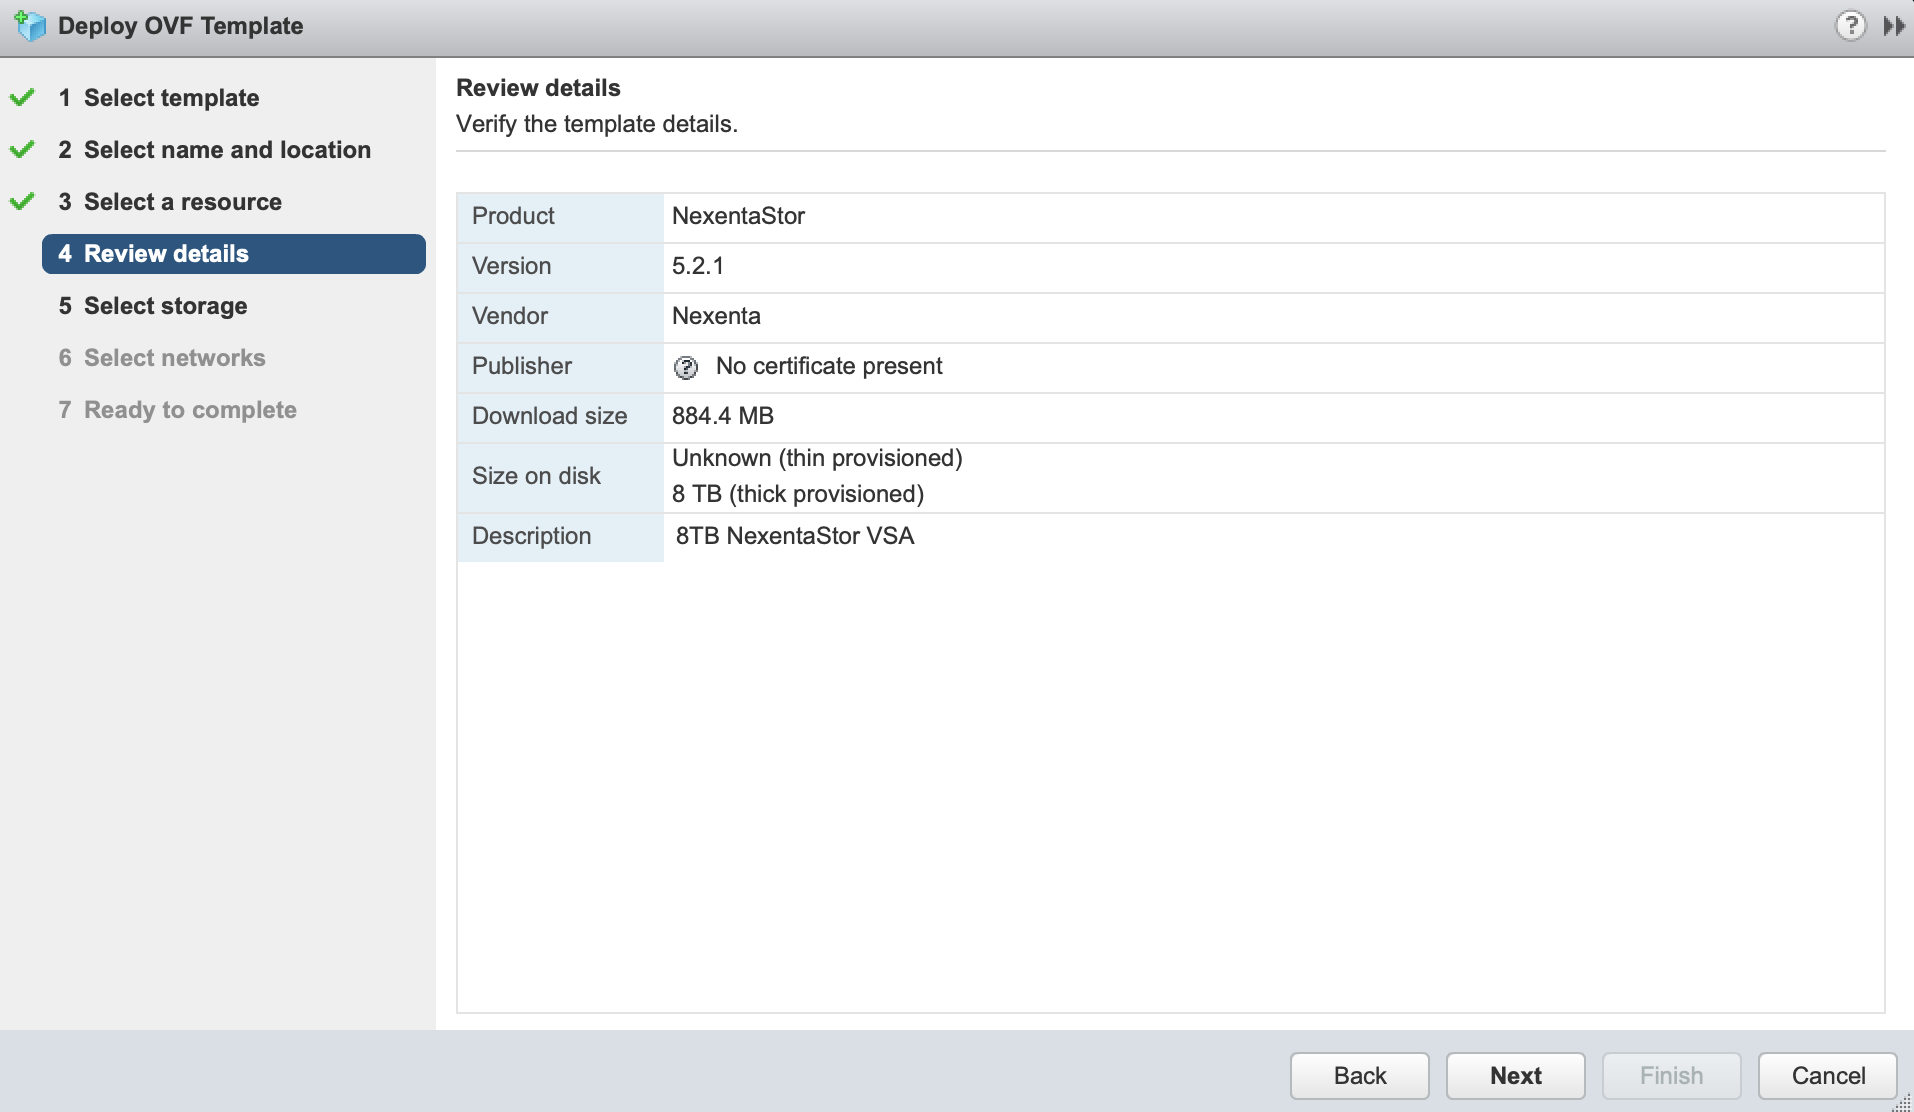
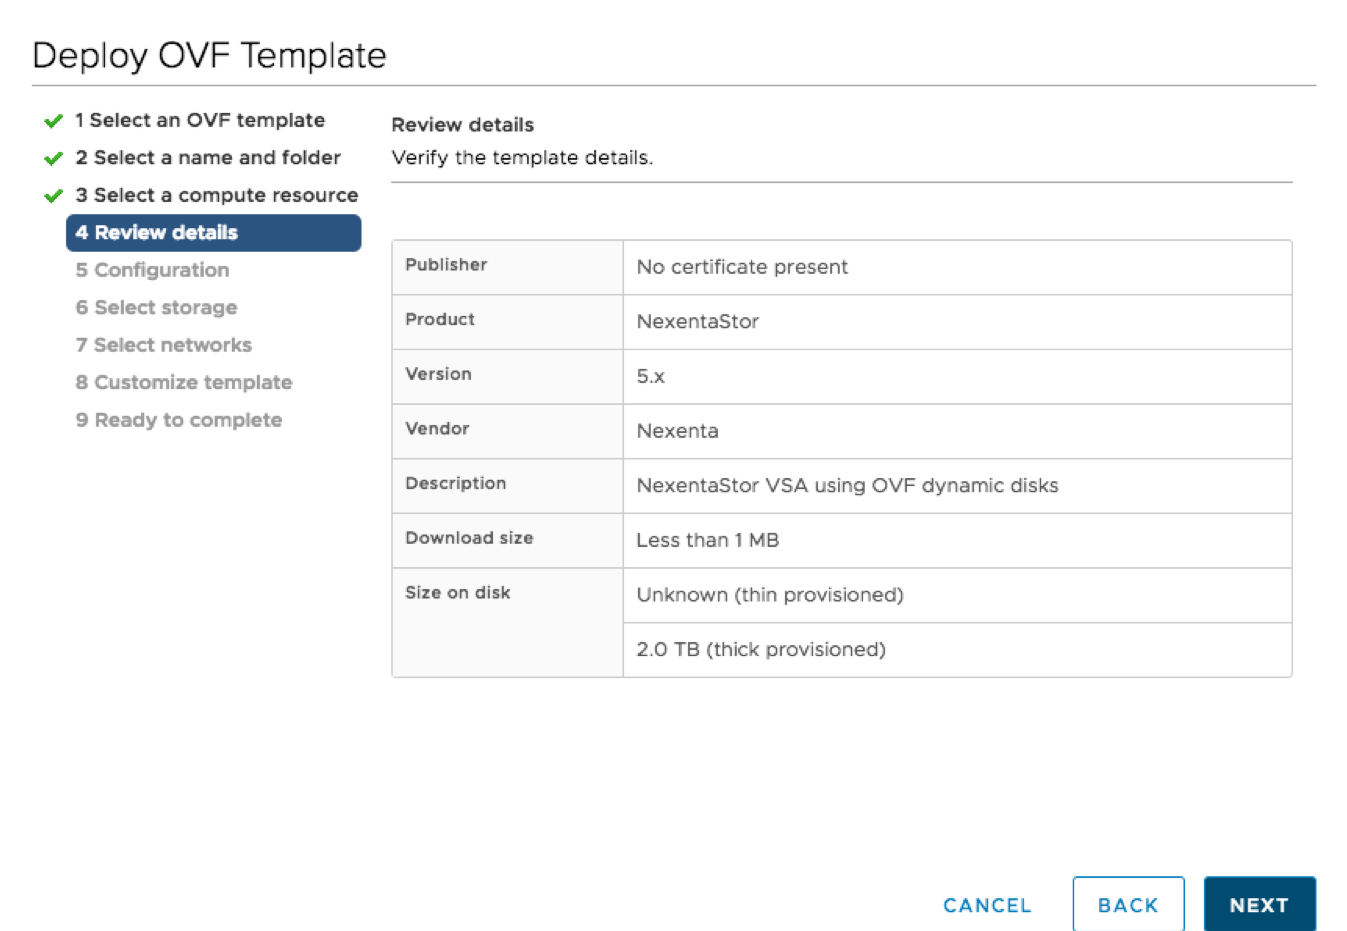
- Review the details.
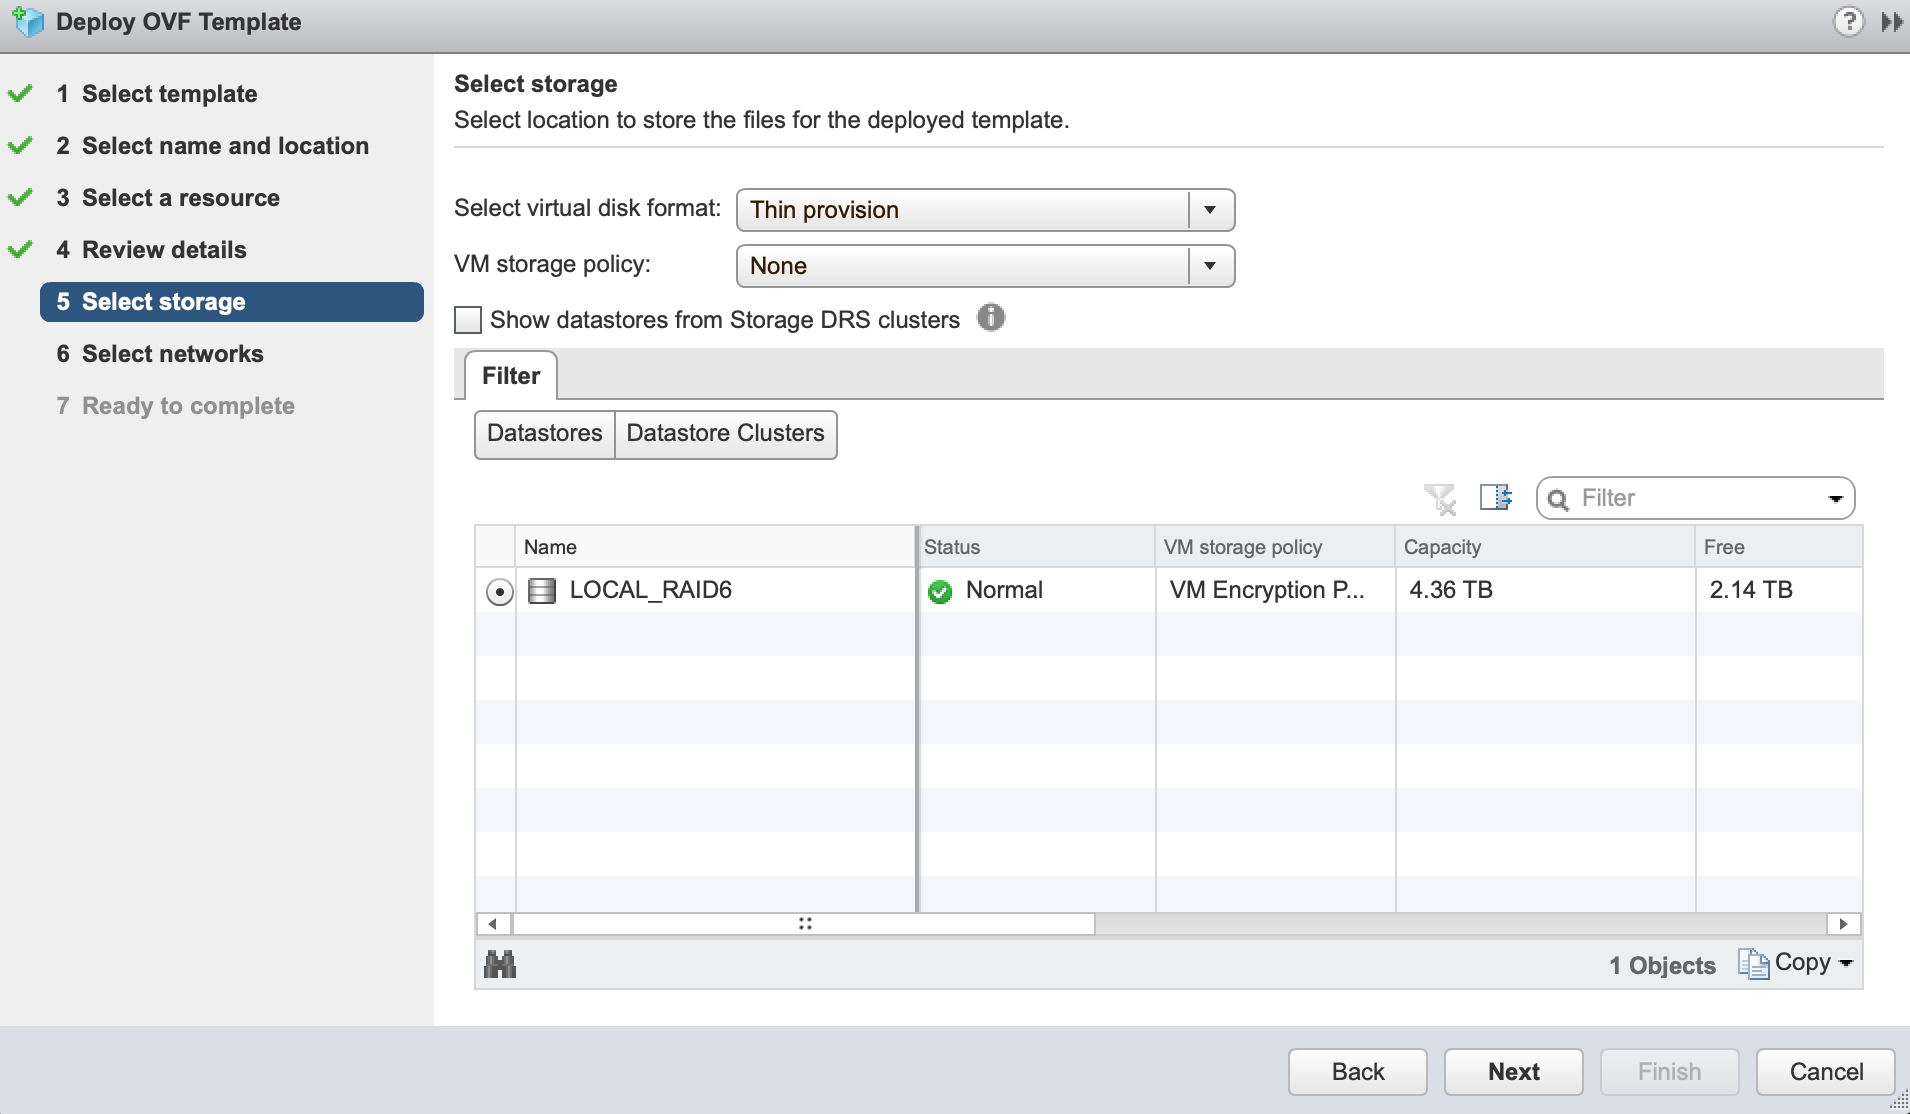
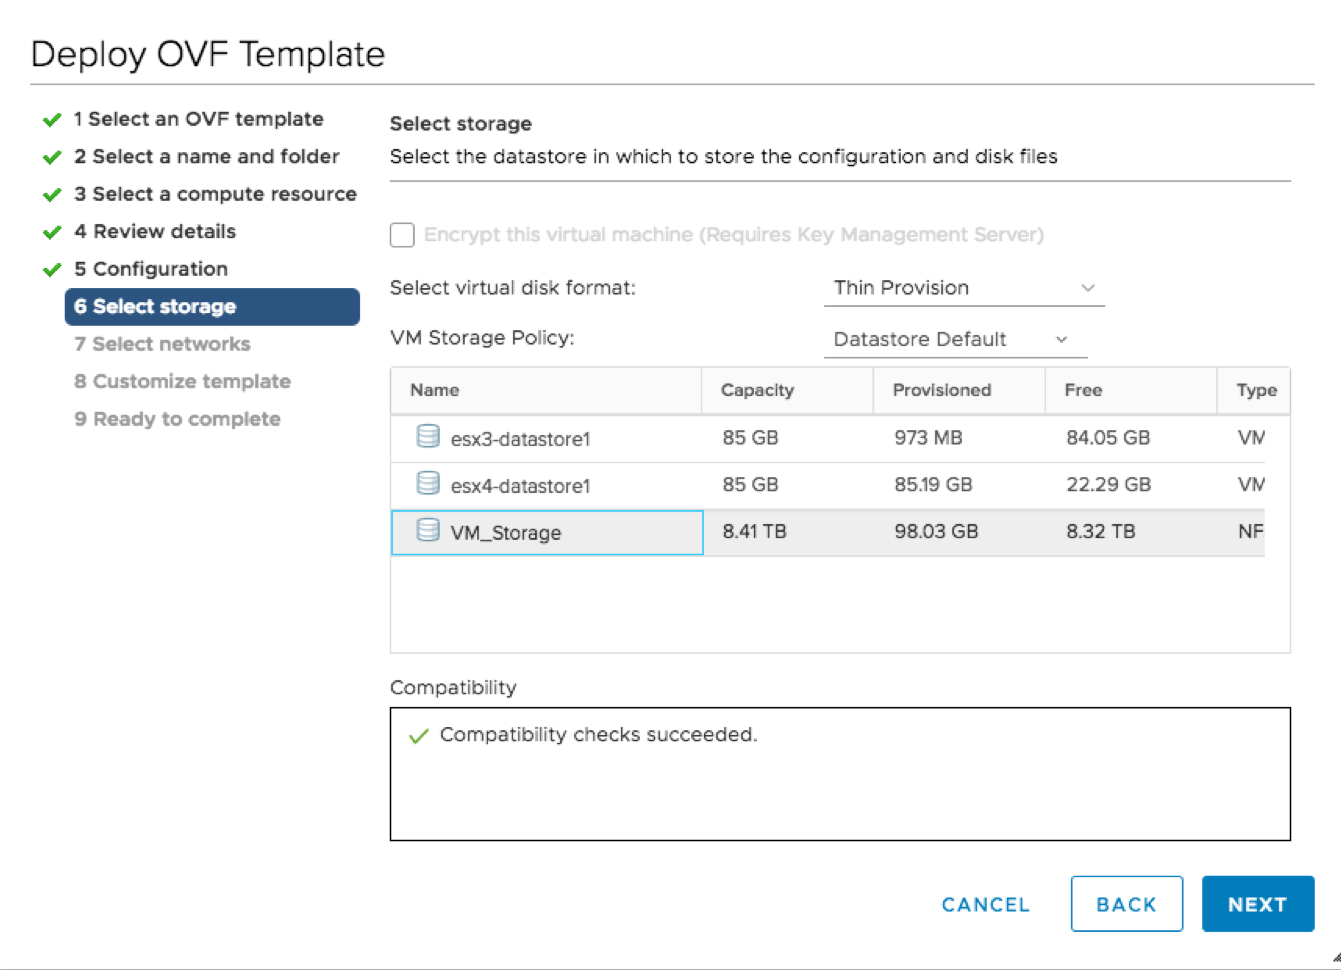
- Select a datastore, and the storage type.
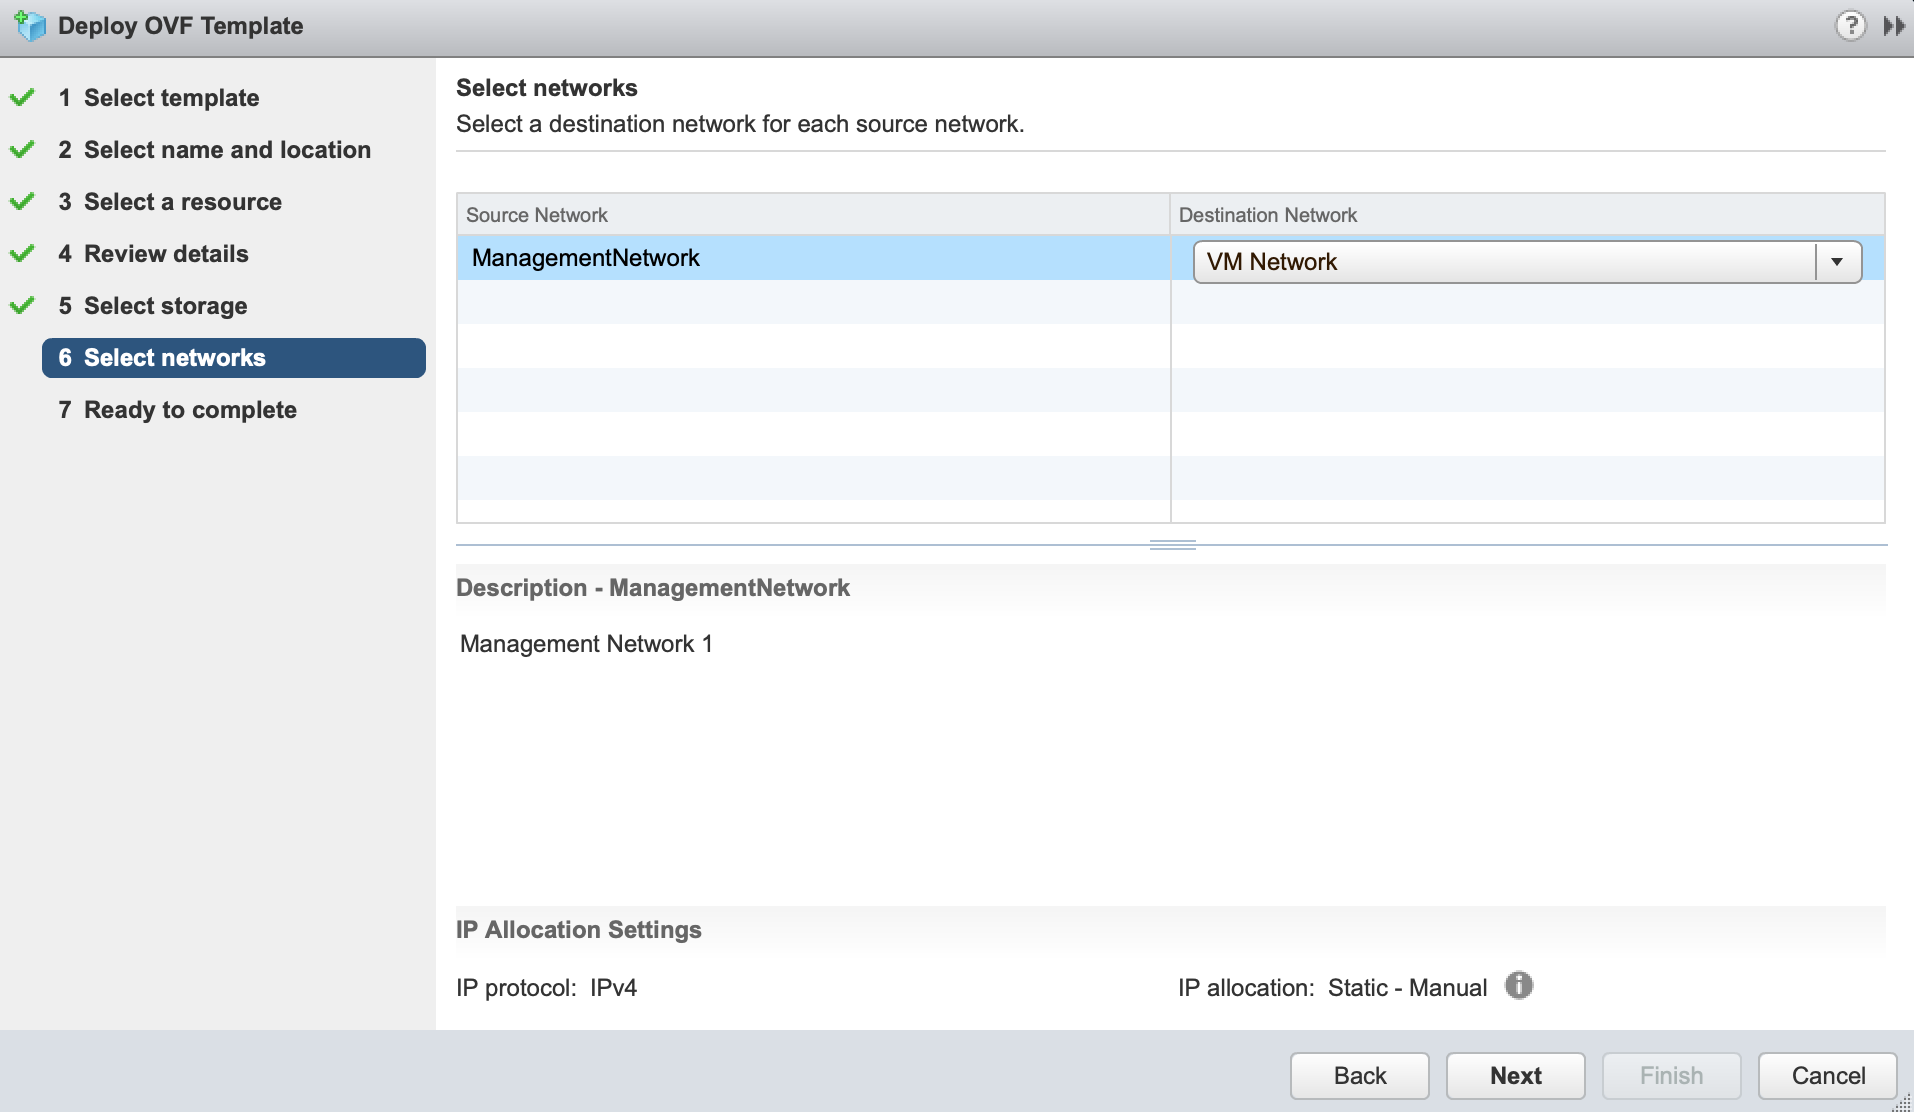
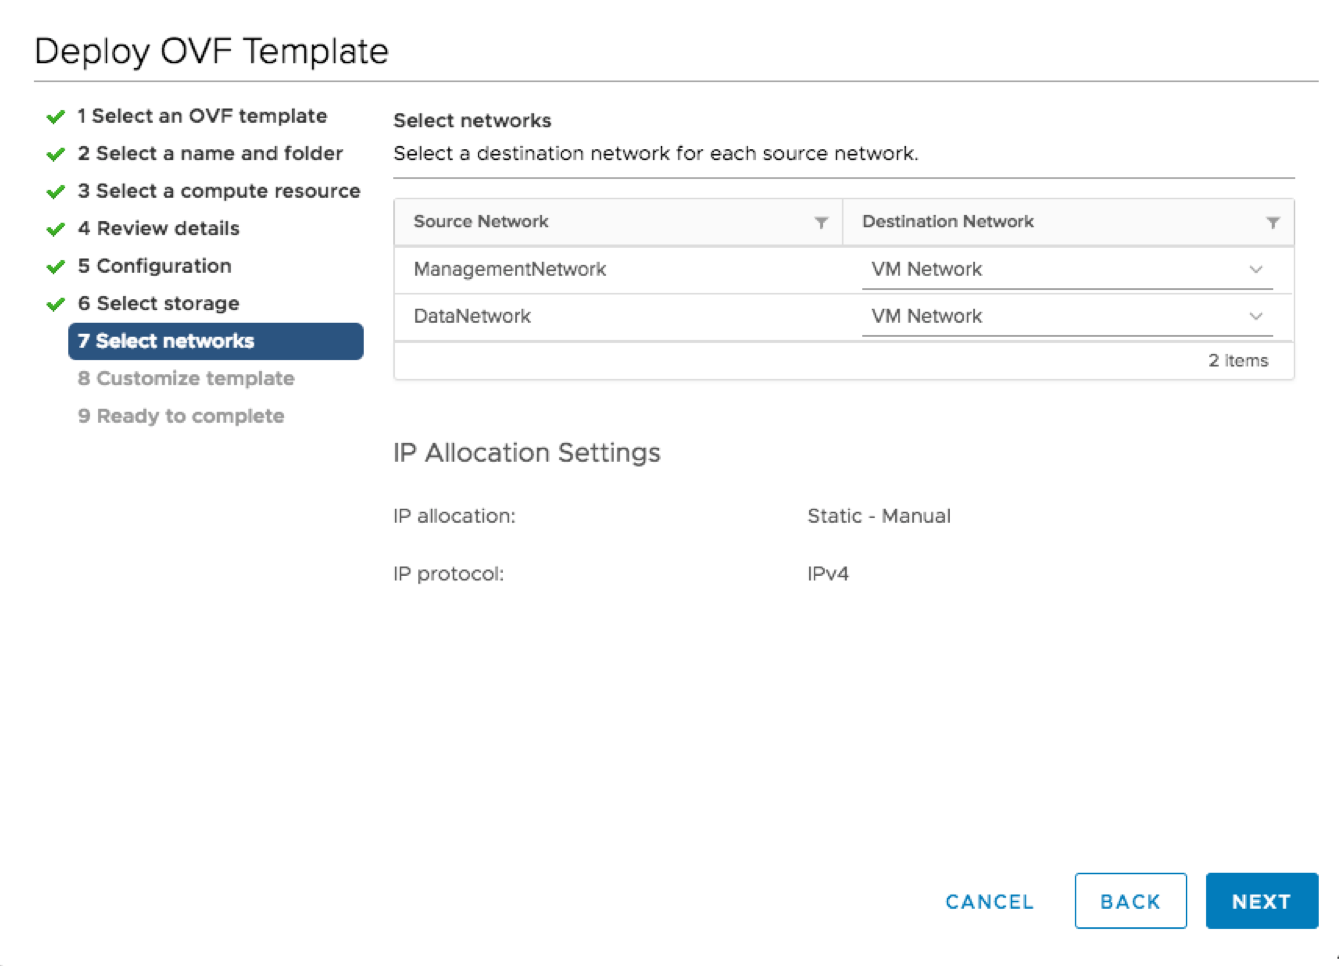
- Select the Network to connect to the VSA.
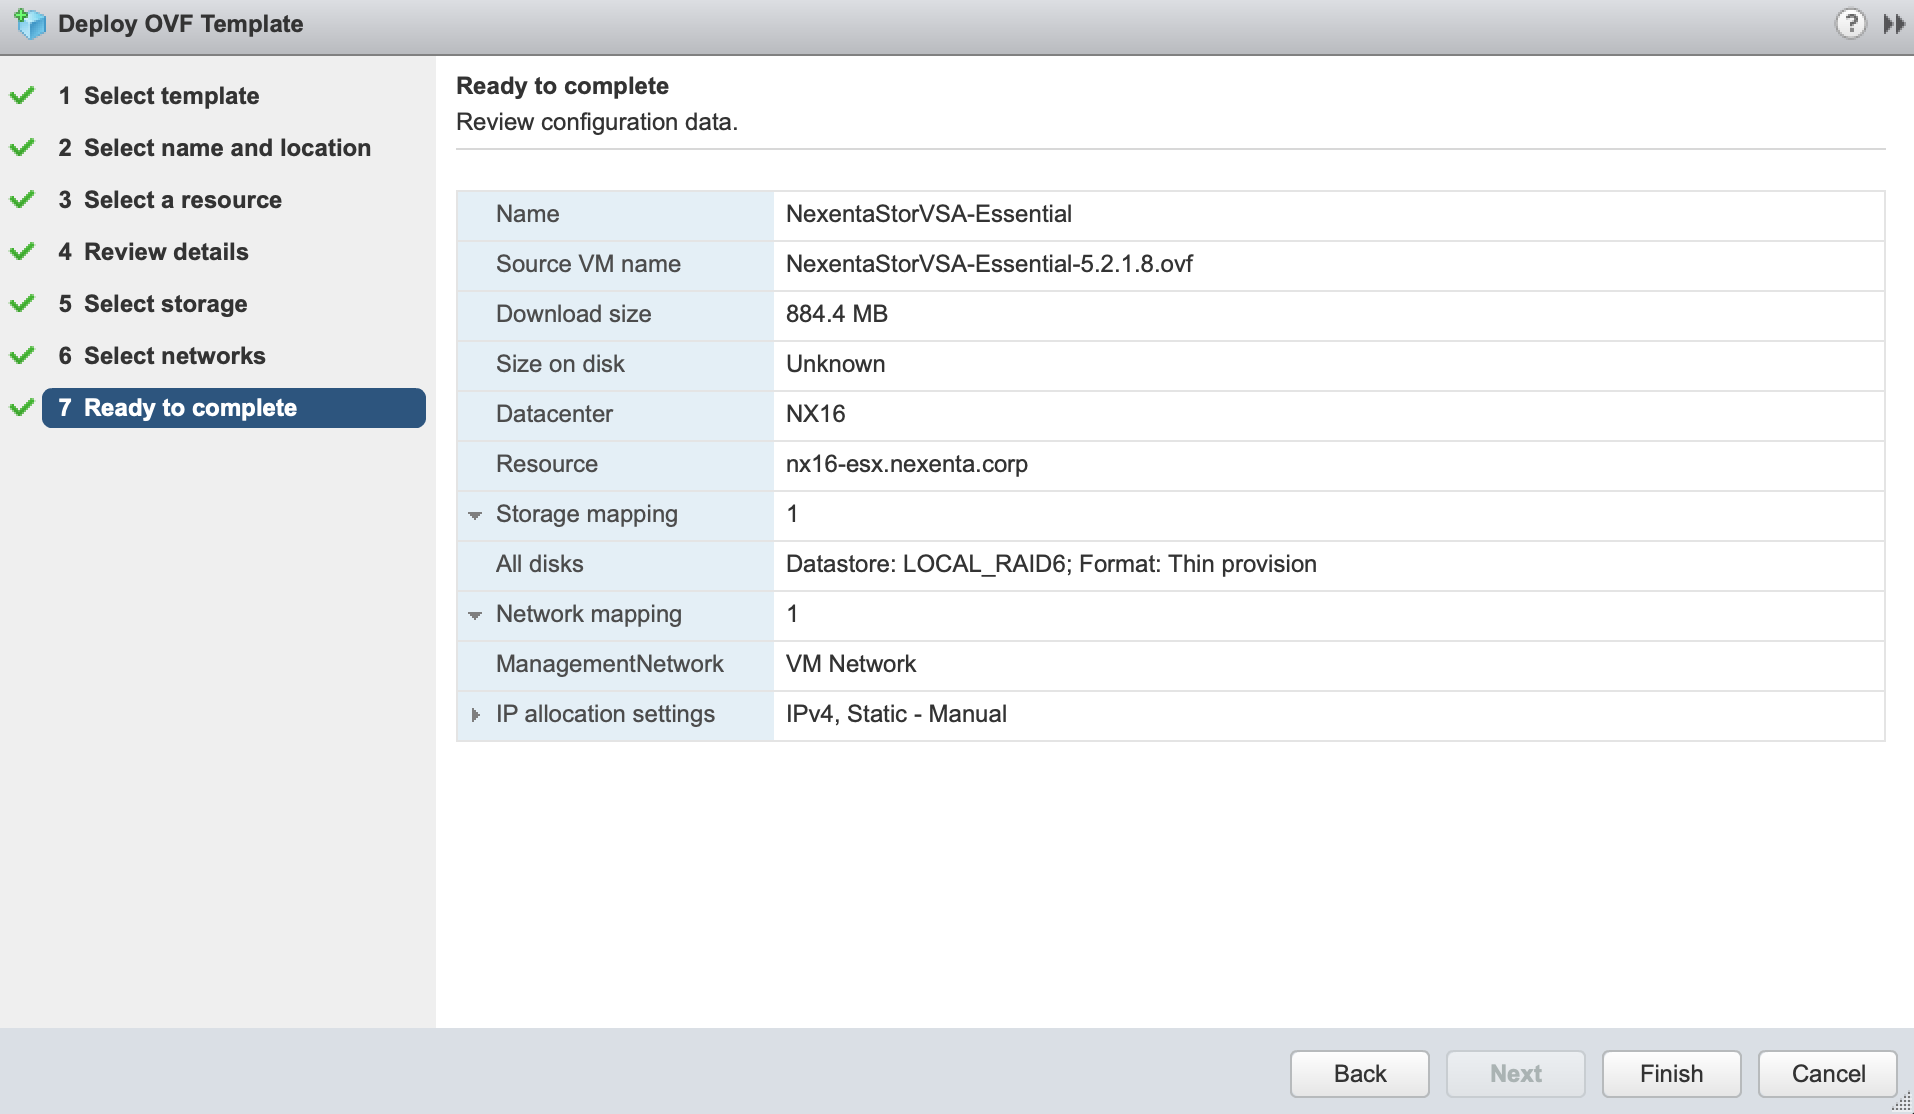
- Confirm the final details and click “Finish” to deploy your Virtual Storage Appliance.
When the NexentaStor Virtual Storage Appliance has been deployed by VMware, there are a few steps left to complete the setup. To perform these steps the administrator must login through the console using the default credentials:
- Username: admin
- Password: Psswd1234
- Run the system setupcommand to update hostname, change any network configuration and update your passwords.
- Add your license using the “license activate <token>” command.
Note that you can register for a Community Edition license at https://community.nexenta.com/s/community-edition, or request a free Enterprise Edition trial license: https://nexenta.com/downloads
- To use the preconfigured VMDK’s you will need to create a storage pool. Use the below command to create a pool named “tank”:
pool create-auto stripe tank -M 4
- The last step to give users access to the files is to create a filesystem and share it via NFS or SMB. This can be done through the CLI, throughNexentaFusion or through the NexentaStor vCenter Plugin.
Taking the EZ-Pass Lane to a Hybrid Storage Cloud
25 Jul 2018 by Nexenta
Everyone wants to get from point a to point b as fast as possible and transitioning from a traditional datacenter to a modern hybrid or all cloud based infrastructure should not be any different. Just like the EZ-Pass lanes at toll booths get you moving quicker, the new One-Click Deployment of NexentaCloud will move you from a traditional on-prem storage to a cloud based storage solution quickly and easily. The steps below will walk you through the simple wizard that is built into NexentaFusion to deploy NexentaCloud in less than 30 minutes for up to 300TB!
Install NexentaFusion to manage your NexentaCloud instances in one of three ways:
- VMware OVF – https://prodpkg.nexenta.com/nfusion/1.2.0.19/img/NexentaFusion-1.2.0.ova
- Docker Container – https://nexenta.github.io/nexenta-fusion/
- Amazon AWS Marketplace – https://amzn.to/2L063VL
Once yo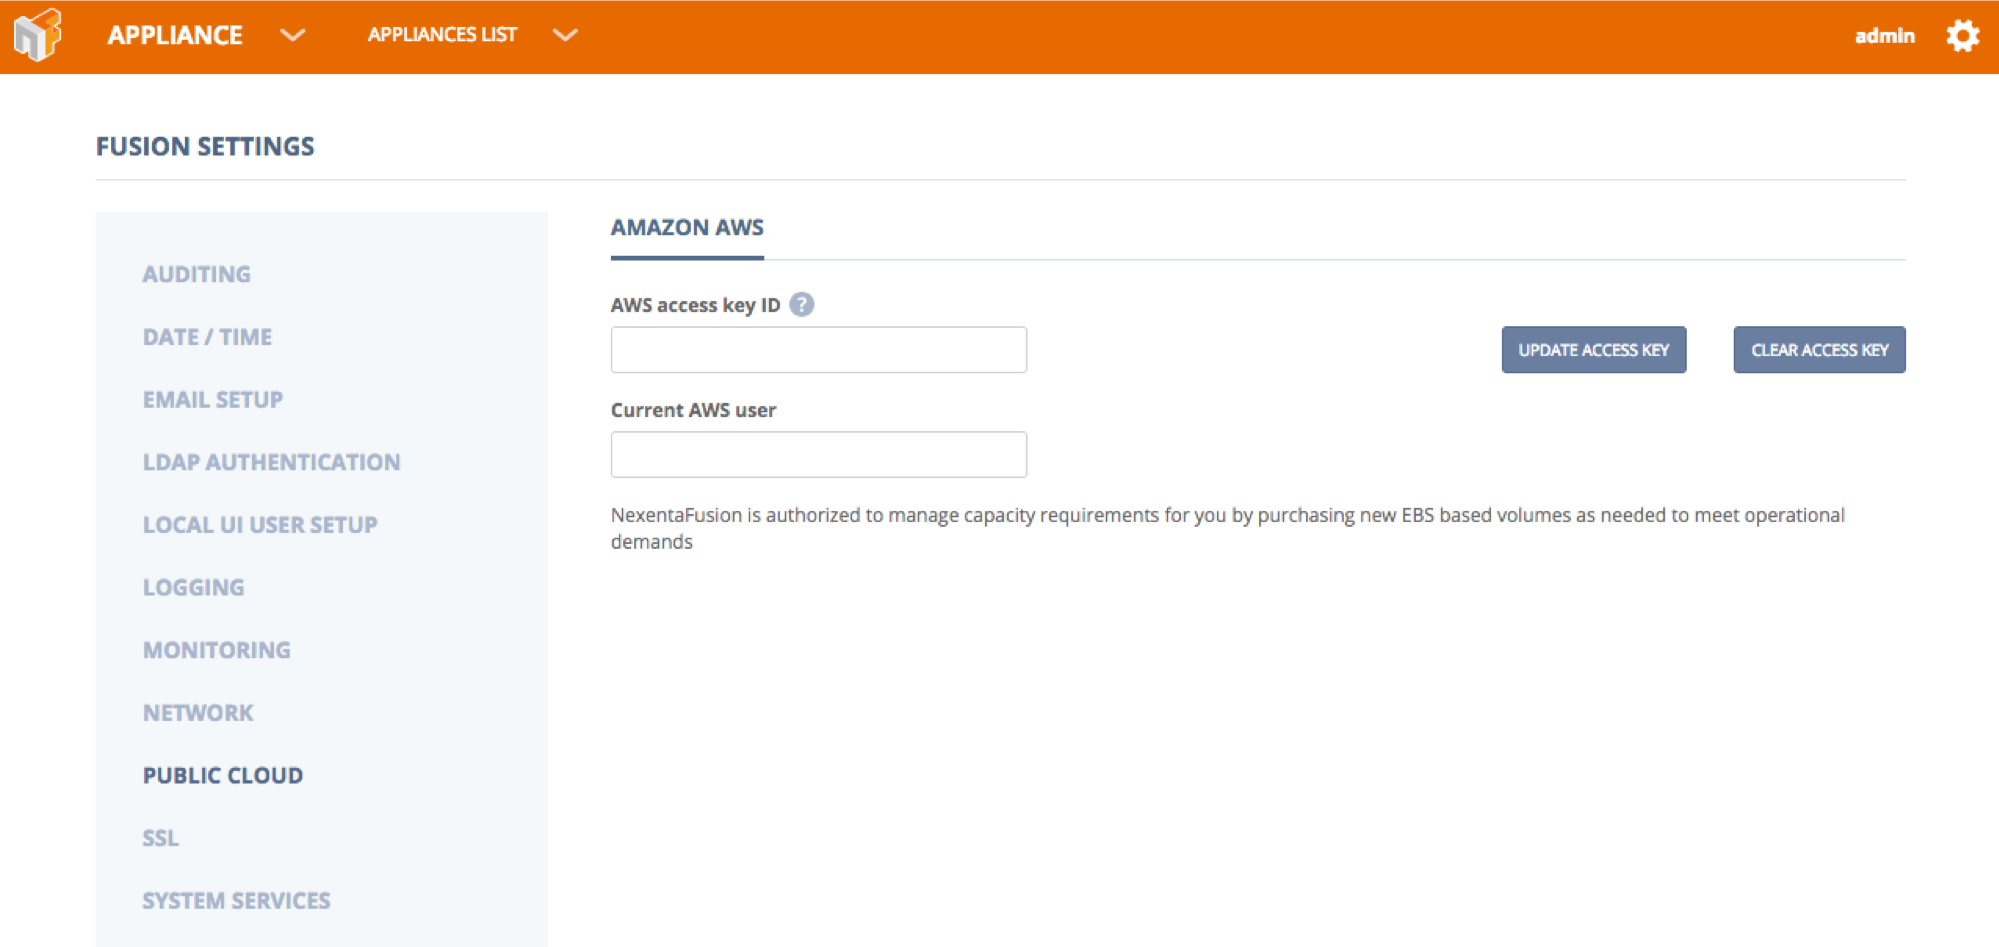 u have NexentaFusion installed you only need to add in your AWS access keys in the Fusion Settings. They can be found under the main cog – Settings – Public Cloud, this has to be set to allow NexentaFusion to interact with the Amazon API.
From here on out the steps get easier and easier.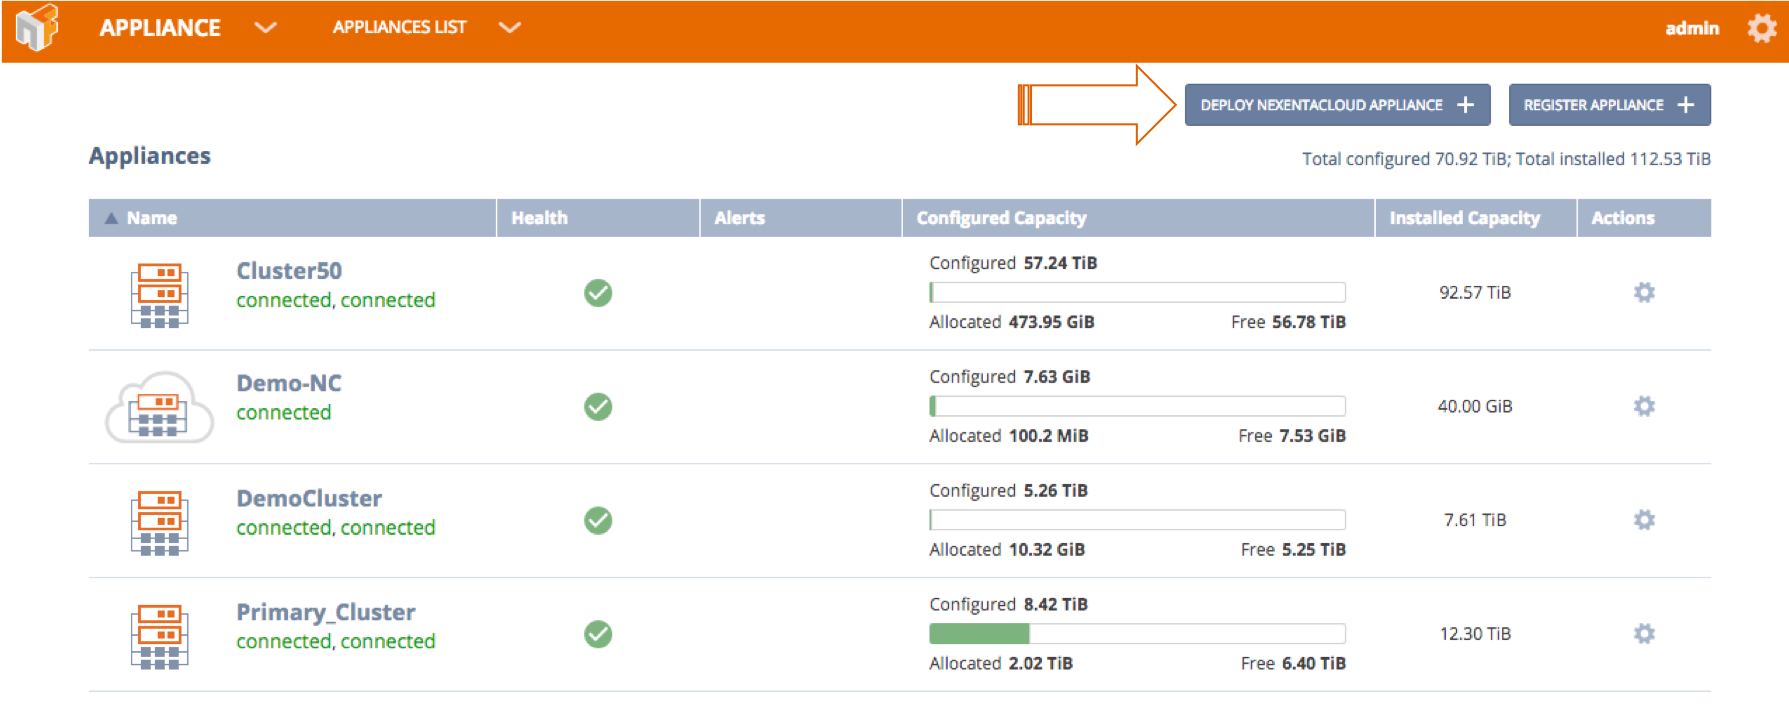 .From the All Appliance Screen you click on the “Deploy NexentaCloud Instance Button to start the wizard.
Next you will get an info screen to ve rify your access key and a reminder that you need to make sure to accept the EULA on the AWS Marketplace for the NexentaCloud Listing.
The next part of the wizard will ask for basic machine information (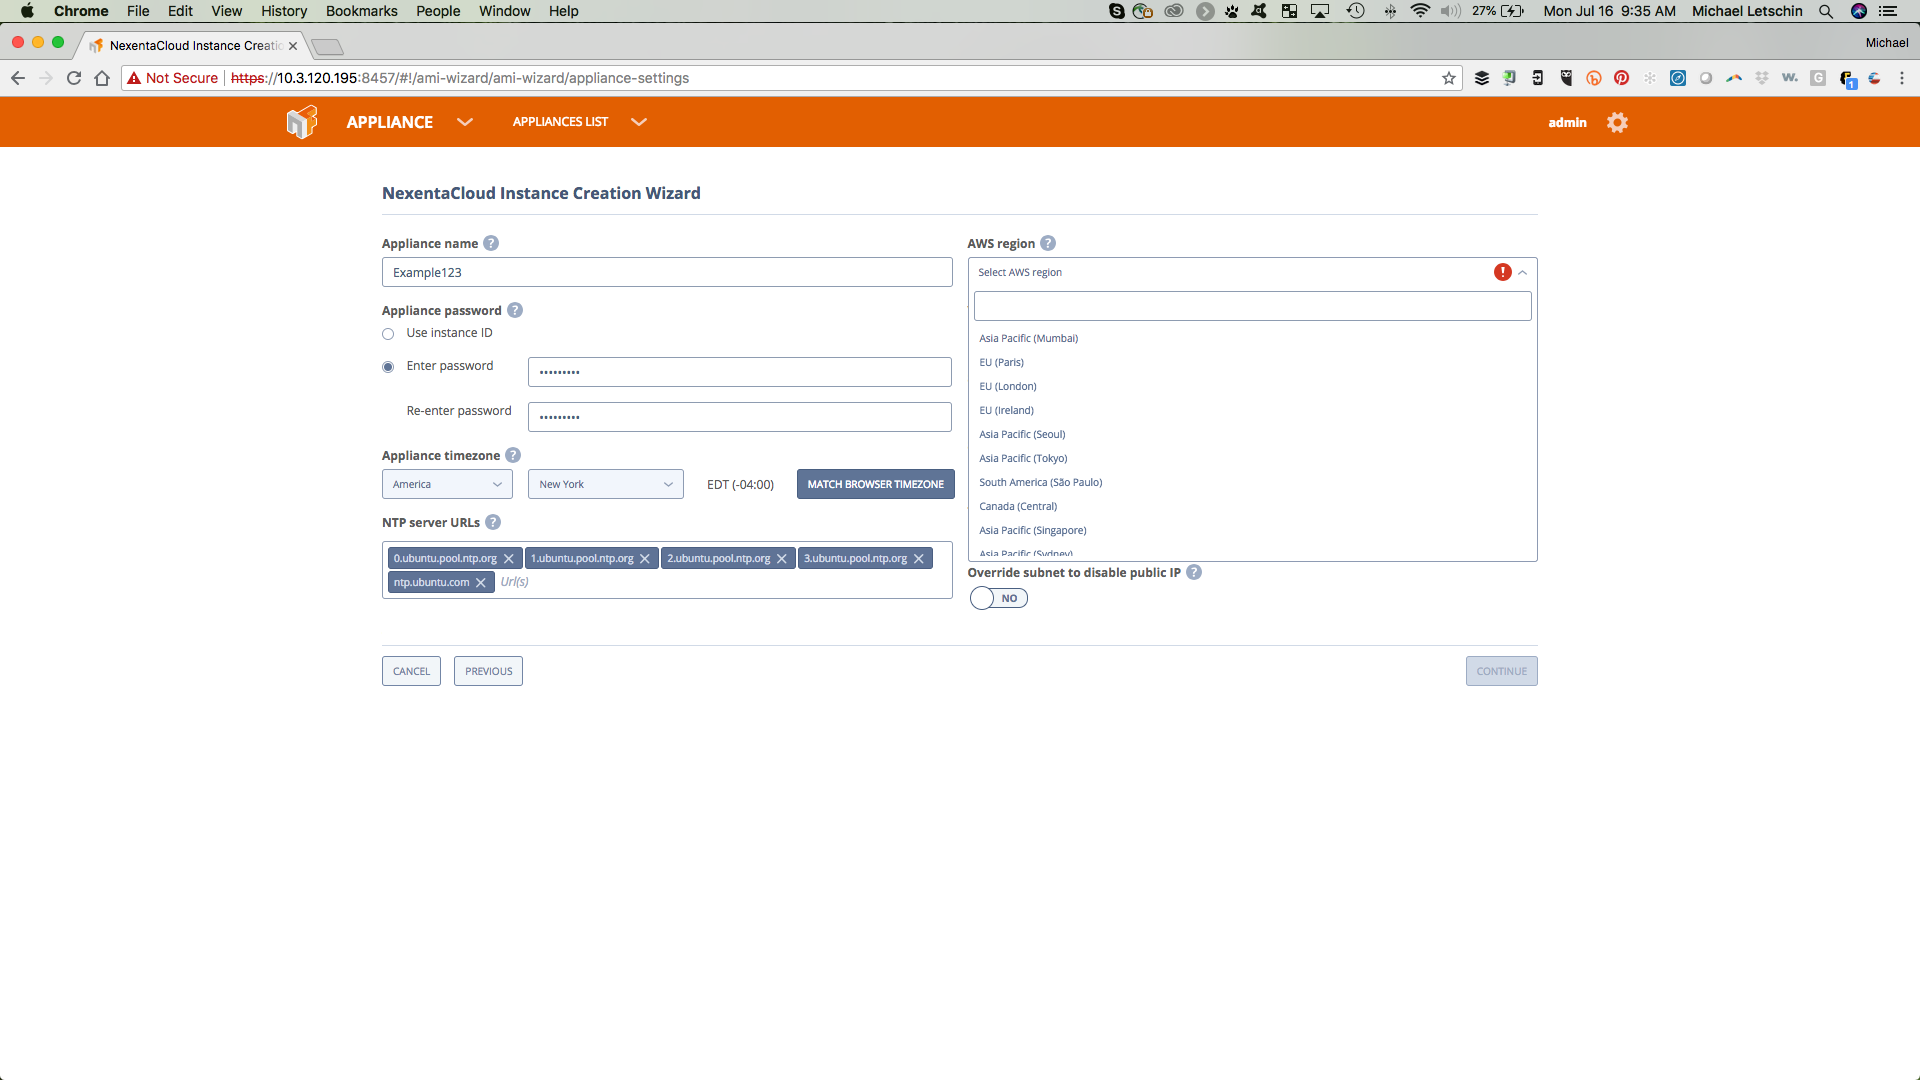 Name, Password, Timezone) and the initial AWS Configuration (Region, VPC, Subnet, Security Groups). If you dont have security groups set already, we can create one with the default ports needed.
 The last information you will need to enter is the type workload you will be using this system for and then drag the sliders to the appropriate capacity. You can add capacity through the NexentaFusion instance later as you grow.
Once you have confirmed the information, click Deploy Now. Within the next 30 minutes you will be on your way to using the Hybrid Storage Cloud that you have been trying to get to.
File Services for HCI and Block Storage Simplified
17 Jul 2018 by Nexenta
Check out our video “Deploying NexentaStor as a Virtual Storage Appliance“.
Today’s modern datacenter has a combination of compute, storage and networking options. This includes an ever-growing use of hyperconverged and block only storage systems. These systems are great for running virtual machines, but users and applications still require file services to conduct daily business. Deploying a file services solution for NFS or SMB connections can be a labor intensive and expensive proposition; to combat that, Nexenta provides a quick and easy way for administrators to add file services to their existing virtual infrastructure. One of the many deployment models of the NexentaStor solution is as a virtual storage appliance (VSA). To make this even simpler and faster for our end users, we have packaged NexentaStor as an OVF appliance. The NexentaStor OVF is installed directly from a single URL for the OVF:
https://prodpkg.nexenta.com/nstor/5.2.1.8/addons/NexentaStorVSA.ovf
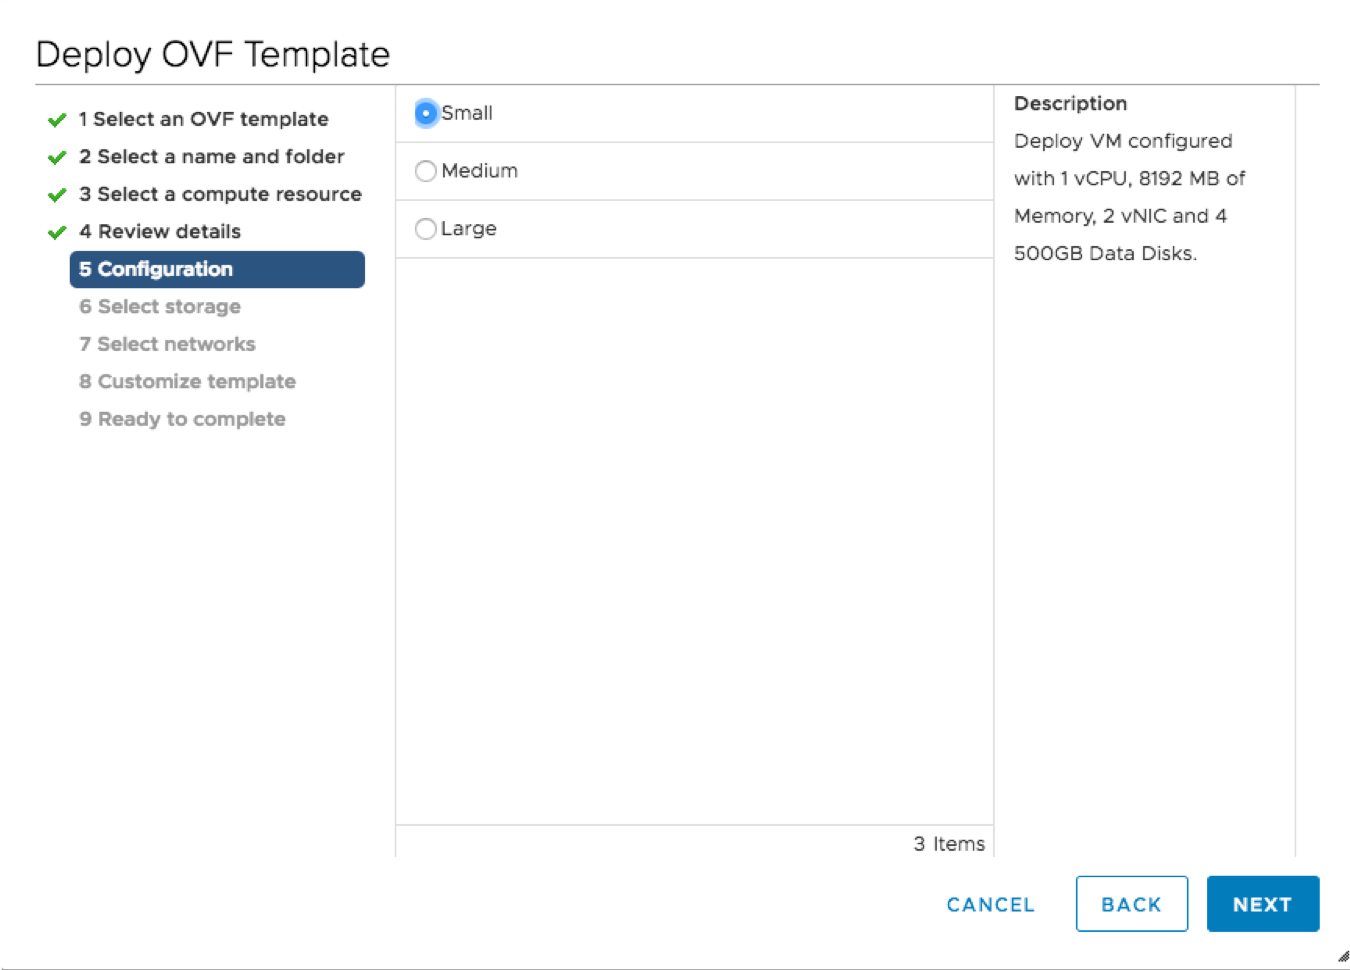
To deploy the NexentaStor Virtual Storage Appliance you simply choose Deploy OVF from the vCenter interface and enter the url. To simplify the solution even more we have customized the OVF to provide you with a best practice configuration for three different VSA builds.
- Small – Proof of Concept and Initial Deployments, Initial Config: 4TB
- Medium – Branch Office File Services, Initial Config 16TB
- Large – Enterprise File, Initial Config 32TB, add more VMDK as you see fit
Each of these will select the correct CPU and Memory, add 2 network interfaces for management and data and add the disks needed to create the first pool for file services.
If you already know how to deploy an OVF template skip to the post deployment configuration
OVF Deployment
- Right Click on your Cluster and “Deploy OVF Template”

- Enter the url https://prodpkg.nexenta.com/nstor/5.1.2.0/addons/NexentaStor-VSA.ovf
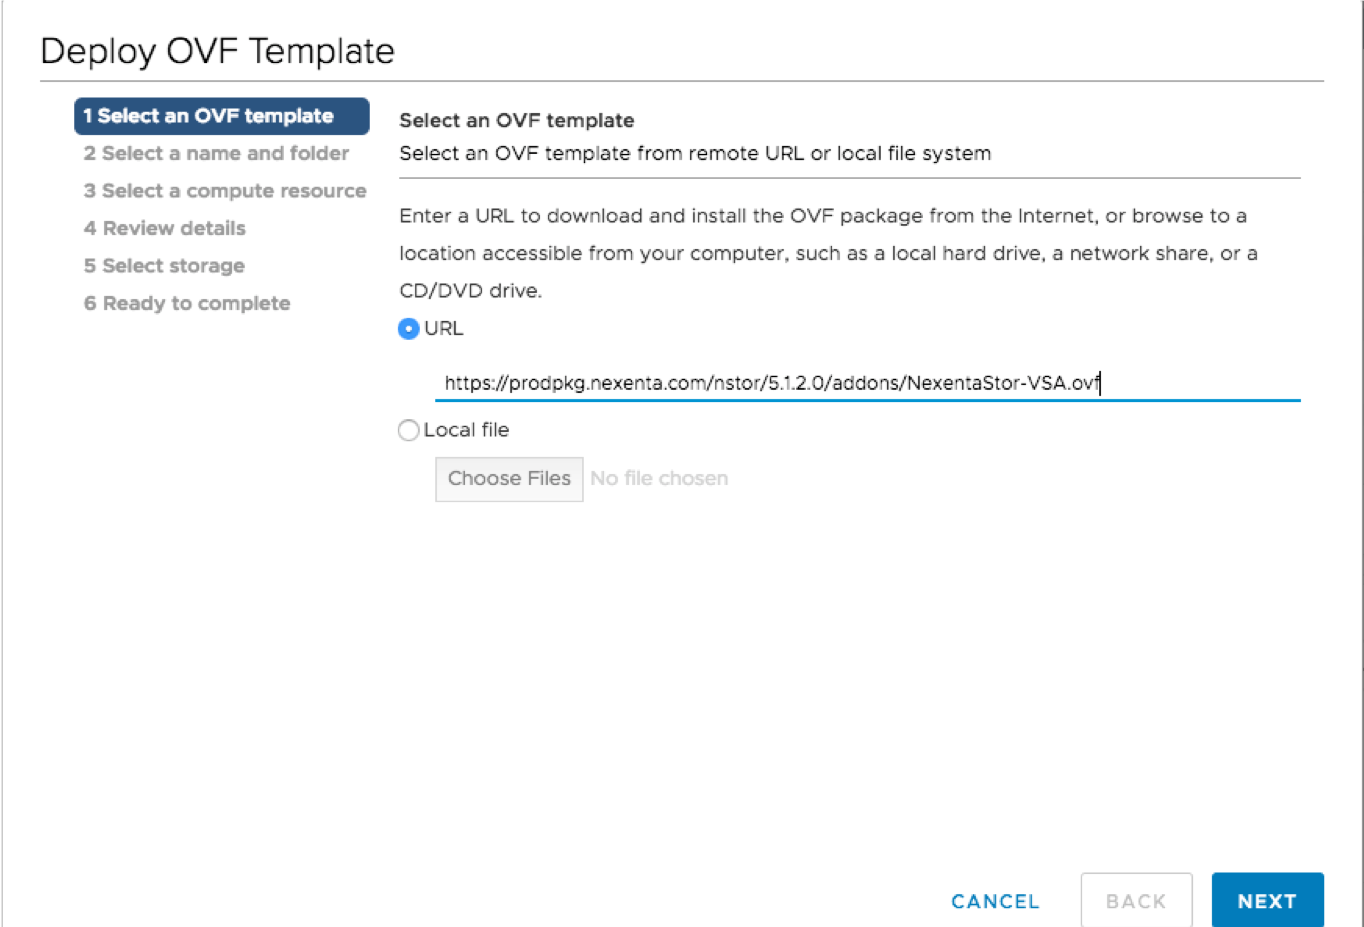
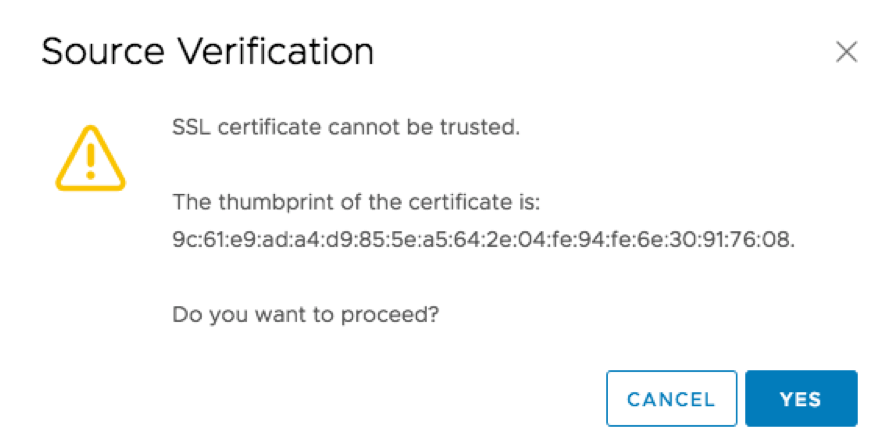
- Trust the certificate
- Select your name and folder
- Select your compute resource
- Confirm the details
- Select the size VSA you would like to deploy. All the virtual hardware options can be edited after deployment if needed as well, including adding more drives
- Select where you would like your storage to be deployed
- Select the appropriate virtual networks. Best practice will be to use 2 different networks.
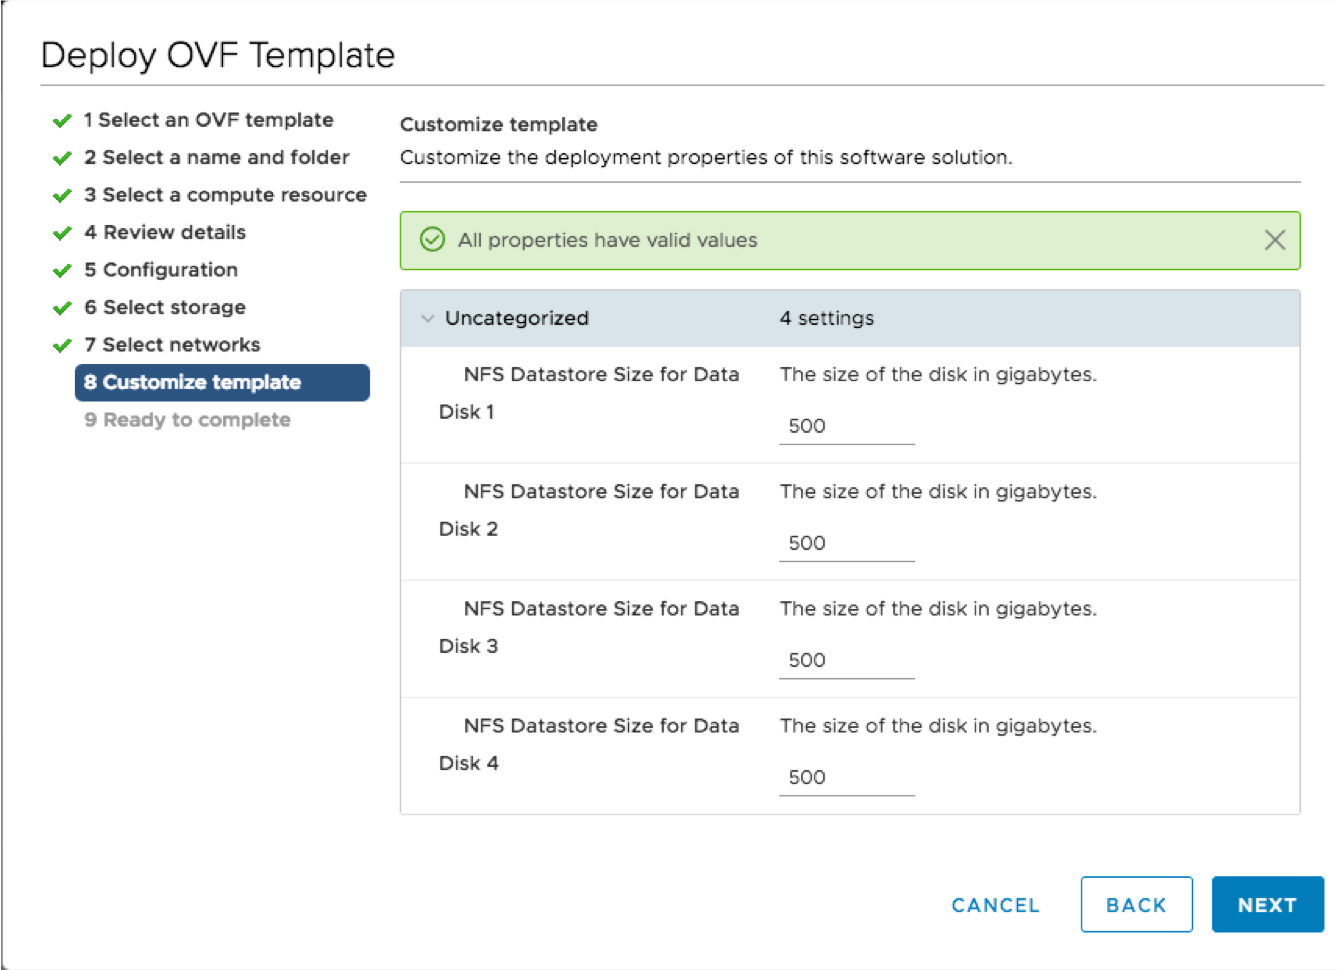
- Validate the size of your first 4 virtual disks, this is auto populated depending on the size of your VSA but you can change them now.
- Confirm all your options and you are all set to deploy your NexentaStor Virtual Storage Appliance

Post Deployment Configuration
Once you have deployed the OVF, power on and log into the newly created VSA using the following credentials.
- Username : admin
- Password: Psswd1234 (You are definitely going to want to change that one)
Next run the following steps to reset the hostname, password and settings needed for your environment:
-
- Run the following command command to setup the appliance
-
system setup
-
- Activate your license – You can get a trial license at https://nexenta.com/downloads
-
license activate
-
- Create your pool – This will create a stripe pool names Pool1 using 4 drives. All these variables can be changed.
-
pool create-auto stripe Pool1 -M 4
-
- The last step to give users access to the files is to create a filesystem and share it, this can be done through the CLI, through NexentaFusion or through the NexentaStor vCenter Plugin
- Run the following command command to setup the appliance
For more, check out our video “Deploying NexentaStor as a Virtual Storage Appliance“.
“NAS-up” Your Hyper-converged Infrastructure or SAN with NexentaStor (and get hybrid cloud, too)
29 May 2018 by Nexenta
By Michael Richtberg, Nexenta Advisory Board Member
It’s a great day when you get a deal on something you really need. Getting the most out of your existing IT infrastructure can really help you afford adding other business critical investments instead of duplicating something you already own. In the case of hyper-converged infrastructure or SAN block storage, you can increase the usefulness of these investments by adding full NAS capabilities without adding more hardware by using Nexenta’s leading storage software solution, NexentaStor.
If you picked one of the excellent options available today to address high performance storage like an all-flash array or the flexible scale out option of hyper-converged infrastructure (HCI), then you’ve already got the baseline to enable a full service SAN andNAS protocol storage system. Most of the HCI and SAN options available today provide block only protocols like iSCSI or Fiber Channel (FC). Adding the SMB and NFS protocols normally provided by a separateNAS storage system adds more expense, complexity, and hardware. Nexenta offers a better option that transforms your SAN/HCI investment into a NAS using software only.
Adding the full enterprise-class NAS capabilities to an existing investment in HCI or SAN hardware creates a full service solution to expand your usefulness to applications or users that need file services. Common use case examples include providing user file shares and VDI profiles, centralizing branch office file content, back-up applications, and line of business applications.
Some resourceful IT teams may turn to a DIY option like using a Linux or Windows server to present NAS protocols leveraging block storage LUNs. While it addresses the protocol requirement, it adds the complexity of using a general purpose operating system and all of the lifecycle patching that goes with it. Instead, NexentaStor provides a fit-for-purpose storage system that specializes in providing full-featured enterprise NAS capabilities including all of the advanced data services. By simply provisioning a low overhead virtual machine (VM) for NexentaStor, you get a software-defined storage solution that adds all of the NAS protocol interfaces, plus:
- Advanced caching algorithms for higher performance
- Lifecycle management (cloning, provisioning, snapshotting)
- Full ACL and AD user management
- Data efficiency services (inline data reduction)
- Full data resiliency (HA, RAID, replication, copy-on-write file system, & 256 bit checksum on all data)
- QoS throughput quota control
- HDD or SSD media options
- Integrated vCenter management and unified management of multiple NexentaStor VMs using NexentaFusion
NexentaStor uses the physical storage capacity presented via VMware’s VMDK interface. The VM hosting NexentaStor turns this capacity into the useful NAS interfaces presented as SMB, NFS or even iSCSI protocols and operates as a virtual storage appliance. A NexentaStor vCenter plug-in provides a seamless integration interface for VMware administrators for a simplified management experience.
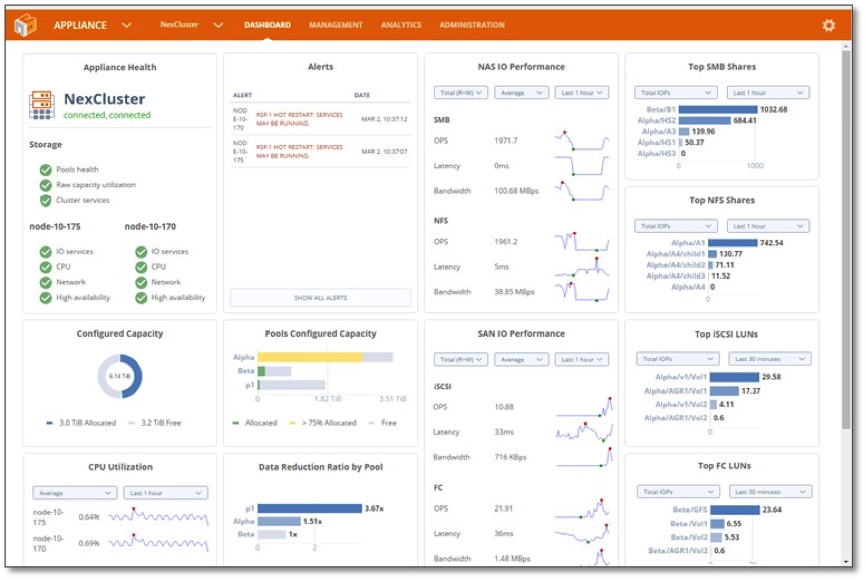
For customers using multiple HCI clusters, such as branch office locations, having separate file services enabled by NexentaStor are easily unified for centralized management using NexentaFusion. The same applies for scenarios where multiple SAN deployments may require separate NexentaStor VMs for NAS services. NexentaFusion provides management consolidation, extensive analytics, and health monitoring from a single pane of glass regardless of location.
As public cloud becomes a common option for off-site data protection or extensibility, Nexenta offers the flexibility to leverage AWS using NexentaCloud. Sharing the same excellent code used in NexentaStor, NexentaCloud runs on AWS to create a private extension of your on-premises SAN or HCI systems. Consider the simplicity this offers for automating off-site replications or snapshots using the standard features of NexentaStor. The option of using NexentaCloud also provides the ability to supplement your on-premises storage with additional capacity via AWS. NexentaFusion pulls all of the NexentaStor and NexentaCloud capabilities together into a single unified administration tool.
In summary, adding NexentaStor to your SAN or HCI systems provides a cost effective, software-only solution that adds all of the enterprise class NAS features you need without adding additional stand-alone systems. NexentaStor provides all of the enterprise features you expect using an extremely efficient virtual storage appliance that simply occupies a virtual machine on existing systems. Leveraging the capabilities of NexentaCloud, we extend deployment options to the public cloud for greater flexibility with simple unified management.
For more information, please see our NexentaStor Product Page or contact us for a follow-up sales conversation.
NexentaCloud Complements On-Prem NexentaStor for Hybrid Deployments
11 Apr 2018 by Nexenta
By Michael Richtberg, a Nexenta Advisory Board member and former VP of Strategy and Corporate Development at SoftNAS.
Thousands of Nexenta customers have come to trust our open-source driven software-defined storage software that enables a truly hardware independent storage solution. We offer full enterprise class data services for industry standard NAS and SAN protocols, which have become table stakes, used by virtually all organizations to run their business applications. All of these on-premises qualities found in our flagship NexentaStor solution are now available to our customers via the public cloud with NexentaCloud, running on Amazon Web Services (AWS).
The world of data services remains fundamental to the on-going operations of our business world. The inventory of existing applications and accompanying data will remain long past retirement of most of you reading this blog. Leveraging existing assets in the new public cloud IaaS platforms allows enterprises to gain excellent infrastructure flexibility, but there may be a need for more functionality.
Today’s on-premises NAS and SAN storage systems have evolved over years. Optimizations in data services like snapshotting, cloning, replication, compression, and numerous performance elements are almost taken for granted as core features for storage systems. As you enter the public cloud infrastructure, you may find “storage” but most of these advanced features, and even the protocols you’ve come to expect, just aren’t available on the public cloud storage systems.
NexentaCloud comes to you as a complement to the industry leading NexentaStor software-defined storage product. NexentaCloud brings you the same hardware flexibility but with the added ability to host your NAS/SAN on AWS. Supporting industry standard protocols, you can now use existing, unaltered applications that need SMB, NFS, or iSCSI protocols. Our “no data left behind” offering lets you create virtual storage appliances in just a few clicks using the AWS Marketplace options, available in various capacities.
What about hybrid?
This is where the real rubber meets the road! Not everyone is ready to make the shift to a full blown cloud only environment. In fact, most will find hybrid is the ideal use case for a long time. Through the unified management and analytics tools of NexentaFusion, you can see and adjust your on-premises and cloud deployments in a single pane of glass. If you need to adjust the data storage location for optimizing cost, performance, or geo proximity, then NexentaFusion provides the ideal solution for hybrid deployments. NexentaFusion can run on-premises or on AWS and it’s included for free with NexentaCloud! Concerned about over-spending or zombie workloads that keep running up your cloud tab? NexentaFusion helps you monitor activity and analyze your utilization for optimizing your storage deployments with ease.
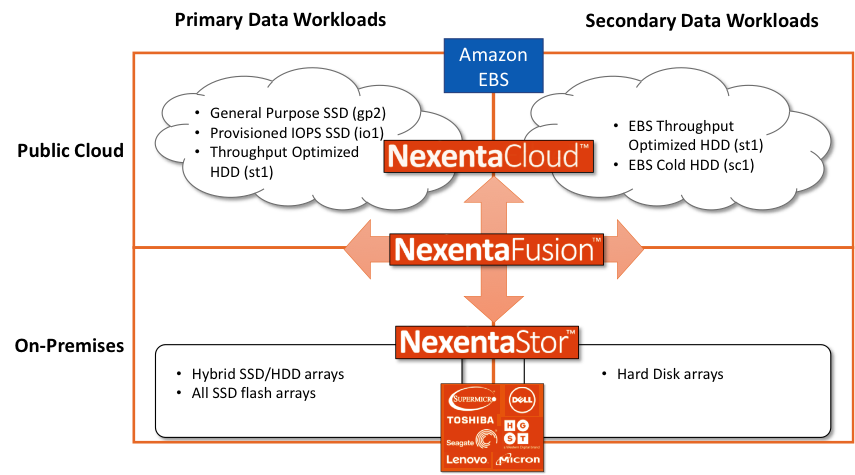
NexentaCloud opens up your storage and data management possibility to best accommodate your needs for flexible data location and expansion. Taking advantage of different media and storage possibilities, Nexenta provides excellent cost and performance combinations for primary and secondary storage use cases.
At Nexenta, we’ve heard your requests for enabling flexible, agile, and extensible storage systems. Join us in the journey to the cloud!
For more information, visit us at https://nexenta.com/nexentacloud.